Page 1 of 1
Fork Oil Change
Posted: Sun Mar 30, 2014 3:17 pm
by 0face
Anybody want to post a How To? I'm about to embark on this.
Re: Fork Oil Change
Posted: Sun Mar 30, 2014 3:38 pm
by Bust
no...
http://www.fjrtech.net/getdbitem.cfm?item=47" onclick="window.open(this.href);return false;
Re: Fork Oil Change
Posted: Sun Mar 30, 2014 4:08 pm
by Queensland Ken
Easy enough. Do you have a service manual ?
The volume of oil published in the manual doesn't equal the required air gap.
Gen 1 or 2 ?
Re: Fork Oil Change
Posted: Sun Mar 30, 2014 4:34 pm
by 0face
Gen 2. I have a service manual. Just thought some pics would be helpful.
Re: Fork Oil Change
Posted: Sun Mar 30, 2014 4:46 pm
by extrememarine
Just finished putting mine back together. My forks are not standard OEM, so pictures would not follow exactly, but I can put together the text for it if you take pictures.
Re: Fork Oil Change
Posted: Sun Mar 30, 2014 5:26 pm
by bluesdog
I may have some pics, if you need 'em. Just remember the FSM official procedure is unduely complicated: Removing the entire fairing is not necessary.
You can access the lower pinch bolts from below, and slide the forks out. Loosen the cap bolts after loosening the upper pinch bolt, while the forks are still held in place by the lower pinch bolts.
Take care when loosening the lower pinch bolts that the forks don't drop suddenly. I placed an old cushion below in just in case, but didn't need it.
When replacing the forks, don't over-torque the pinch bolts. I just snugged them enough to hold them in place, then re-installed the front wheel, making sure everything was aligned properly before tightening.
I'll go look for my pics now...
Re: Fork Oil Change
Posted: Sun Mar 30, 2014 6:22 pm
by bluesdog
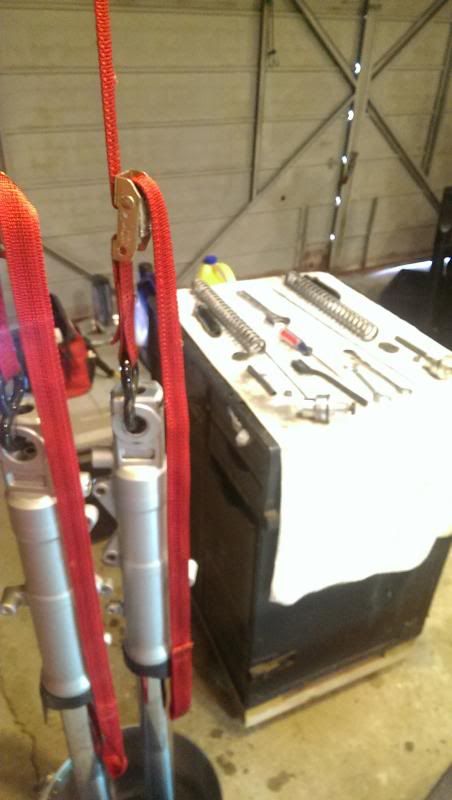
Make sure the bike is securely supported. You are removing the front wheel, so make sure you jack up the front so there's no weight on the wheel. Use tie-downs at the rear, but don't rely on the center stand. I used a home-made support fabricated from a short length of 2 X 4, with a couple of smaller pieces glued/screwed at each end, and a floor jack. The wooden support contacted the frame at each side of the exhaust headers. You can see it in action in the second pic below.
iirc, I didn't remove any tupperware. This pic shows there's plenty room for a torque wrench, if accessed from below:

Remove front fender, and brake calipers. Hang calipers with heavy string/cord looped/tied to the rad bracket or something -- don't let 'em dangle on just the brake lines. Place a small piece of wood or plastic wedge between the pads

Remove the front wheel. Loosen the axle pinch bolts first, then remove the axle.
Protect the fuel tank with a thick towel or cloth, and remove the handlebars. Tie the handlebars to each other with another piece of cord. Loosen the upper pinch bolts, and loosen the fork caps

From below, loosen the other two pinch bolts, one fork at a time, and slide the fork down and out.


I can't find any pics of the fluid change out process, but it's pretty straightforward. Just follow the FSM. When filling with fluid, I used a turkey baster with a piece of clear plastic tubing attached, and marked the side of the baster so the total length of tubing plus the portion of the baster was at the required level; then slightly overfilled the fork, and used the baster with the mark aligned to the top of the fork to suck the excess out.
I used the same technique when I installed the AK-20 cartridges.
hth
Re: Fork Oil Change
Posted: Mon Mar 31, 2014 12:06 am
by raYzerman
Next step after you have the forks out is to dump out the oil from the top of the forks (or not), then reinstall the fork caps by hand so they put pressure on the lower cartridge. Clamp the caliper mount bosses in a vice, laying horizontally, then you can remove the lower fork screw (6mm hex) from each one to release the cartridges (otherwise you might need the 'special socket tool'). To remove the screws, use an air powered impact wrench for best results. Then drain residual (it will pour out the bottom screw hole), remove fork caps and cartridges. Rinse with mineral spirits or kerosene and flush with brake cleaner spray.
Are you planning to replace bushings and seals, or just a fluid change?
Re: Fork Oil Change
Posted: Mon Mar 31, 2014 2:53 am
by bluesdog
On Gen IIs, that lower fork hex screw is loctited something fierce by the factory. Gen I forks were not, so I believe. If you are only changing out the oil, you may opt to follow the procedure outlined at FJRTech.com --
http://www.fjrtech.net/getdbitem.cfm?item=47, and save yourself the chore.
When I upgraded to AK-20 cartridges, I cheated by having the local shop remove the cartridges, and had the bushings replaced at the same time. I made sure the insides of the fork tubes were scrupulously clean of all oil residue, so didn't need a special tool to keep the cartridge from spinning, and didn't feel the need to use loctite during reassembly, (it's up to you. I felt it not necessary, and thousands of miles later haven't noticed anything working loose or oil leaking out of the bottoms of the forks!).
Take care during reassembly to not overtighten that jamb nut. To quote Lee at Traxxion:
..the OEM fork caps on the
FJR1300 are designed so the cartridge rod bottoms out inside the fork cap. Then the jam nut is tightened. DO NOT use a torque wrench to tighten that jam nut. You will destroy the cartridge rod since the jam nut is steel and the cartridge rods are 6061 aluminum. Snug the jam nut but do not wail on it with much force. I cannot stress this enough. Over the years, the number of times a customer (all models of motorcycles) has destroyed a cartridge rod because they were used to working with steel cartridge rods that are not easily injured is beyond belief. I consider it evidence that some people simply should not have tools in their hands because they do not understand how each part works with the other parts of the assembly
Re: Fork Oil Change
Posted: Mon Mar 31, 2014 8:00 am
by extrememarine
One tip for making the lower pinch bolts - pick up a spare hex socket and trim it down about half way - it will make getting a ratchet and torque wrench in there much easier.
Re: Fork Oil Change
Posted: Mon Mar 31, 2014 8:19 am
by El Toro Joe
extrememarine wrote:One tip for making the lower pinch bolts - pick up a spare hex socket and trim it down about half way - it will make getting a ratchet and torque wrench in there much easier.
Good tip Wayne...
Re: Fork Oil Change
Posted: Mon Mar 31, 2014 10:17 am
by 0face
Sweet. This is just the info I'm looking for. Thanks!
